Browser sync is one of the good tool to avoid manual browser refresh.
We are going to see:
Introduction Introduction
Browsersync is a Node.js module. It provides a platform for fast network applications.
It is a Time saving synchronized browser testing.
In short, it creates a server like http://localhost:3000/ and watches the file changes. When our specified files change it auto-reloads the browser and shows these changes instantly.
It saves our time to refresh the browser while developing.
How? Let’s keep with me to see how to install and use the NPM package browser-sync.
Crate Example Project Crate Example Project
To test the browser-sync we need an example project. So, Let’s create a simple NPM project.
Step 1: Create a Directory Step 1: Create a Directory
Open the terminal window and navigate to the location where you want to create your project.
I’m creating the directory es6-tutorials in the location D:\xampp\htdocs\reactjs\
E.g.
D:
? cd D:\xampp\htdocs\reactjs\
D:\xampp\htdocs\reactjs\
? mkdir es6-tutorials
D:\xampp\htdocs\reactjs\
? cd es6-tutorials
D:\xampp\htdocs\reactjs\es6-tutorialsStep 2: Initialize NPM Project Step 2: Initialize NPM Project
Install the NPM and Node.js to execute the npm init command.
To initialize the project with the command npm init. Type the command npm init and simply press enter keys.
E.g.
D:\xampp\htdocs\reactjs\es6-tutorials
? npm init
This utility will walk you through creating a package.json file.
It only covers the most common items, and tries to guess sensible defaults.
See `npm help json` for definitive documentation on these fields
and exactly what they do.
Use `npm install <pkg>` afterwards to install a package and
save it as a dependency in the package.json file.
Press ^C at any time to quit.
package name: (es6-tutorials)
version: (1.0.0)
description:
entry point: (index.js)
test command:
git repository:
keywords:
license: (MIT)
About to write to D:\xampp\htdocs\reactjs\es6-tutorials\package.json:
{
  "name": "es6-tutorials",
  "version": "1.0.0",
  "description": "",
  "main": "index.js",
  "scripts": {
    "test": "echo \"Error: no test specified\" && exit 1"
  },
  "author": "Mahesh Waghmare",
  "license": "MIT"
}
Is this OK? (yes)
Here, The new file package.json is added to our project directory D:\xampp\htdocs\reactjs\es6-tutorials\.
The file package.json contain all the information about our NPM project.
OR
You can also use the shorthand method npm init --yes which does not ask you any questions and auto-fill all the default values and create the package.json file.
I have not npm init –yes before because, If you are fresher then you need to know which things NPM asks to create the package.json file.
Step 3: Create a file index.html Step 3: Create a file index.html
Create a simple index.html file that we use for testing the browser sync.
Create file index.html and add the below code within it.
<!DOCTYPE html>
<html>
<head>
    <title>Hello World</title>
</head>
<body>
<script type="text/javascript">
    console.log( 'ok' );
</script>
</body>
</html>Installation Installation
Now, our sample project is ready to install and test the NPM package browser-sync.
If you know a little bit about the NPM packages then you know the installing packages locally for the specific project or globally to use in any project.
Let’s check both installations.
Local Install Local Install
This is the preferred way to use Browsersync – installing it locally for each project. This way the dependency can be added to your package.json file and everyone on your team.
$ npm install browser-syncGlobal Install Global Install
If you would like to run Browsersync from the command line in any directory, it can be installed globally with the following command.
The command installation command is the same as above, We have just added -g which indicates that installing the package in the global scope.
npm install -g browser-syncI’m going to install it globally.
E.g.
D:\xampp\htdocs\reactjs\es6-tutorials
? npm install -g browser-sync
C:\Users\intel\AppData\Roaming\npm\browser-sync -> C:\Users\intel\AppData\Roaming\npm\node_modules\browser-sync\dist\bin.js
npm WARN optional SKIPPING OPTIONAL DEPENDENCY: fsevents@1.2.11 (node_modules\browser-sync\node_modules\fsevents):
npm WARN notsup SKIPPING OPTIONAL DEPENDENCY: Unsupported platform for fsevents@1.2.11: wanted {"os":"darwin","arch":"any"} (current: {"os":"win32","arch":"x64"})
+ browser-sync@2.26.7
updated 7 packages in 98.767s
Here, The NPM package browser-sync is successfully installed with version 2.26.7
Using browser-sync Using browser-sync
Now open the terminal and type the command browser-sync start --server --files "index.html".
E.g.
D:\xampp\htdocs\reactjs\es6-tutorials
? browser-sync start --server --files "index.html"
[Browsersync] Access URLs:
 ------------------------------------
       Local: http://localhost:3000
    External: http://192.168.0.6:3000
 ------------------------------------
          UI: http://localhost:3001
 UI External: http://localhost:3001
 ------------------------------------
[Browsersync] Serving files from: ./
[Browsersync] Watching files...
Here, The command itself describes all the things.
It starts the server on local http://localhost:3000 and checks the changes from the file index.html file.
The browser window auto-open with the location http://localhost:3000. If not then open the browser and visit http://localhost:3000 and open the console tab.
It shows the ok in the console.
You can see something like the below screenshot.

Now, Open the index.html file and change the string ok with Hello World, and save the file.
Now you see the browser auto-reload and it shows the string Hello World in the console.
E.g.

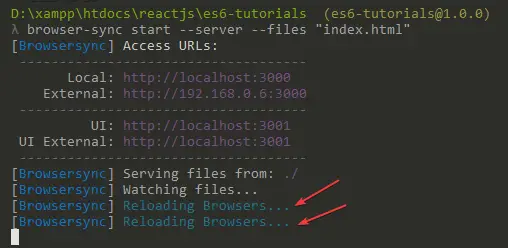
Also, If you notice in our terminal it shows the strings.
..
[Browsersync] Reloading Browsers...
[Browsersync] Reloading Browsers...
This means that our browser is reloaded for each file saved.
e.g.

Advertisement
[ad6]
Example Commands Example Commands
Below are some example commands for reference.
Watch all the CSS files.
? browser-sync start --server --files "*.css"Start a server from the app directory, watching all files
? browser-sync start --server 'app' --files 'app'
As above, but with version >= 2.23.0
? browser-sync app -w
Start a server from the app & .tmp directories (shorthand)
(requires 2.12.1)
? browser-sync start -s 'app' '.tmp' -f 'app' '.tmp'
As above, but with version >= 2.23.0
? browser-sync 'app' '.tmp' -w
Proxy a PHP app + serve static files & watch them
? browser-sync start --proxy 'mylocal.dev' --serveStatic 'public' --files 'public'
Advertisement
[ad7]
As above, but with version >= 2.23.0
? browser-sync 'http://mylocal.dev' 'public' -w
Start Browsersync from a config file
? browser-sync start --config 'conf/browser-sync.js'
Start Browsersync from a config file with overriding flags
? browser-sync start --config 'conf/browser-sync.js' --port 4000
Are you a developer and want to create your own NPM package? Then visit How to create an NPM package.


