In this article, you are going to see how to create a Gutenberg block.
You are going to learn:
Overview Overview
This article is one of the parts of the series Gutenberg Development: Beginner to Advanced.
I am explaining all the details for considering the article for beginner developers. After reading this article you can easily understand the process of creating a Gutenberg block.
In this article, we just set up the boilerplate of our first Gutenberg block. So, Let’s see how to create a custom Gutenberg block.
Requirements Requirements
To get started we need an NPM and Node.js to be installed on the system. NPM is a package manager for Node.js. So, After installing the Node.js you’ll get access to use the NPM too.
See the article install the NPM and Node.js
Available Tools Available Tools
We can create a Gutenberg block from scratch. We custom configure the webpack, Babel, etc but to make the development as simple as possible I’m going to use the below tools to create the first Gutenberg block.
We have 3 tools that provide the Gutenberg block development environment. These tools are:
- create-guten-block – NPM unofficial but pretty awesome package created by Ahmad Awais.
- @wordpress/block – NPM official WordPress package to create a Gutenberg block.
- wp scaffold block – WP CLI package to create a Gutenberg block.
All these tools are nice to create a Gutenberg block boilerplate.
But, I recommend using the create-guten-block for development. We have a WordPress official tool @wordpress/block for development.
The official package @wordpress/block is available from Jan 24, 2020.
I am going to see How to create a Gutenberg block with all the above available tools. Finally, you can choose your favorite tool for creating a Gutenberg block.
Create Gutenberg Block with create-guten-block Create Gutenberg Block with create-guten-block
The create-guten-block is an awesome tool for developing Gutenberg blocks. create-guten-block is developed by ahmadawais.
create-guten-block provides the ZERO configuration setup. create-guten-block is the same as the create-react-app which is used for creating React applications.
Let’s get started.
- Open the Terminal or CMD (command prompt)
- Navigate to the \wp-content\plugins\ directory.
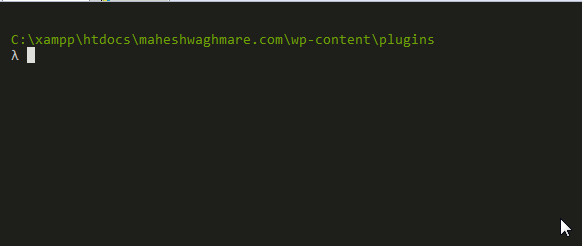
- Type
npx create-guten-block {your-gutenberg-block-plugin}command.
Note: Above command create a WordPress plugin with your provided plugin name.
I’m using the below command:
npx create-guten-block awesome-headings
Here, I am creating a Gutenberg Block plugin with the name awesome-headings.
After executing the above command you can see something similar:
? npx create-guten-block awesome-headings
?   Creating a WP Gutenberg Block plugin called:  awesome-headings
 In the directory: C:\xampp\htdocs\maheshwaghmare.com\wp-content\plugins\awesome-headings
 This might take a couple of minutes.
? 1. Creating the plugin directory called ?  awesome-headings
? 2. Installing npm packages...
? 3. Creating plugin files...
?   All done! Go build some Gutenberg blocks.
CGB (create-guten-block) has created a WordPress plugin called  awesome-headings  that you can use with zero configurations #0CJS to build Gutenberg blocks with ESNext (i.e. ES6/7/8), React.js, JSX, Webpack, ESLint, etc.
Created awesome-headings plugin at: C:\xampp\htdocs\maheshwaghmare.com\wp-content\plugins\awesome-headings
Inside that directory, you can run several commands:
?   Type  npm start
      Use to compile and run the block in development mode.
      Watches for any changes and reports back any errors in your code.
?   Type  npm run build
      Use to build production code for your block inside dist folder.
      Runs once and reports back the gzip file sizes of the produced code.
?   Type  npm run eject
      Removes this tool and copies build dependencies, configuration files
      and scripts into the plugin folder. ??  It's a one way street.
      If you do this, you can’t go back!
 ?   Support create-guten-block ?
Love create-guten-block? You can now support this free and open source project. Supporting CGB means more updates and better maintenance:
  Support for one hour or more ? https://AhmdA.ws/CGB99
  More ways to support ? https://AhmdA.ws/CGBSupport
  Check out my best work. VSCode Power User ? https://VSCode.pro
  Get Started ?
 We suggest that you begin by typing:
  cd awesome-headings
  npm start
See the below screenshot for reference:

If we see the plugins directory we can see that the new directory awesome-headings with all required files and folders.
See the below screenshot for reference.

We have a proper setup for our new block awesome-headings – CGB Block.
We can see the development files and folders into the directory \plugins\awesome-headings\src\
????block
	????block.js
	????editor.scss
	????style.scss
????blocks.js
????common.scss
????init.php
If you open the file block/block.js then you can see the code something like below:
//  Import CSS.
import './editor.scss';
import './style.scss';
const { __ } = wp.i18n; // Import __() from wp.i18n
const { registerBlockType } = wp.blocks; // Import registerBlockType() from wp.blocks
The above code is written NEW JavaScript format which is ECMAScript 6 is also known as ES6 and ECMAScript 2015 and with JSX.
The new ES6 format is not supported for all browsers also browsers don’t read the JSX expressions. We need to make the browser supported format JS files.
As I describe to you earlier that the create-guten-block tool provides the ZERO configuration setup. So, We don’t need to configure anything.
Simply execute the command npm run build.
What does the npm run build command?
Simply it build the executable files which files browsers can read.
We have a directory \src\ in which we have a .js files (written in ES6 & JSX code) & .scss files. Both files are not readable by browser.
So, The npm run build command create a directory \dist\ and create the .js and .css iles:
????blocks.build.js
????blocks.editor.build.css
????blocks.style.build.css
Here, We have 3 files which are readable by browser.
Now, Lets create the build files for our awesome-headings – CGB Block Gutenberg block.
- Go to \wp-content\plugins\awesome-headings\
- Execute the command
npm run build
e.g.
? npm run build
> awesome-headings-cgb-guten-block@1.0.0 build C:\xampp\htdocs\maheshwaghmare.com\wp-content\plugins\awesome-headings
> cgb-scripts build
 Let's build and compile the files...
?   Built successfully!
 File sizes after gzip:
 671 B — ./dist/ blocks.build.js
 134 B — ./dist/ blocks.editor.build.css
 135 B — ./dist/ blocks.style.build.css
?   Support Awais via VSCode Power User at https://VSCode.pro ?
You can see the screenshot somethine like below:

Now, Our block files are build and ready to see in Gutenberg editor.
Let’s see how our first block looks like in the Gutenberg editor. First we need to activate our plugin.
- Go to /wp-admin/plugins.php screen and activate the
awesome-headings — CGB Gutenberg Block Plugin.
See below screenshot for reference:

- Now, Let’s create a new post from Posts > Add new
- Type
/awesome in the editor which shows the available bocks.

Or
We can search the block in top right corner.

- Now, Click on awesome-headings – CGB Block
- Click on the Publish button

- Now, Click on View Post to see your post on frontend.

Here, We can see our first Gutenberg block output in post content.
I have use the default WordPress theme Twenty Twenty to avoid any CSS or JS conflicts. You can use any your favorite theme for development.
I recommend to use the default WordPress themes while development. Also, deactivate all other plugins. Once your development is complete and plugins is ready to test then you can test the plugin with different themes and different plugins.
Create Gutenberg Block with @wordpress/block Create Gutenberg Block with @wordpress/block
The @wordpress/block is also inspired by create-react-app. The create-react-app is used for creating the react app.
Lets see how to create custom gutenberg block with @wordpress/block.
- Goto /wp-content/plugins/ directory and execute below command:
npm init @wordpress/block awesome-heading-with-wordpress-block
Here, the awesome-heading-with-wordpress-block is our plugin name. The package @wordpress/block create a ready to use Gutenberg block for us.
After executing above command you can see something similar:
? npm init @wordpress/block awesome-heading-with-wordpress-block
npx: installed 205 in 62.679s
Creating a new WordPress block in "awesome-heading-with-wordpress-block" folder.
Creating a "package.json" file.
Installing packages. It might take a couple of minutes.
Formatting JavaScript files.
Compiling block.
Done: block "Awesome Heading With WordPress Block" bootstrapped in the "awesome-heading-with-wordpress-block" folder.
Inside that directory, you can run several commands:
  $ npm start
    Starts the build for development.
  $ npm run build
    Builds the code for production.
  $ npm run format:js
    Formats JavaScript files.
  $ npm run lint:css
    Lints CSS files.
  $ npm run lint:js
    Lints JavaScript files.
  $ npm run packages-update
    Updates WordPress packages to the latest version.
You can start by typing:
  $ cd awesome-heading-with-wordpress-block
  $ npm start
Code is Poetry
See below screenshot for reference:

Same as create-guten-block the NPM package @wordpress/block also create a directory awesome-heading-with-wordpress-block into /wp-content/plugins/ directory. The file structure looks like below:
????.editorconfig
????.gitignore
????awesome-heading-with-wordpress-block.php
????build
???????index.asset.php
???????index.js
????editor.css
????node_modules
????package-lock.json
????package.json
????readme.txt
????src
???????edit.js
???????index.js
???????save.js
????style.css
Now, Lets see how our first block looks like in the Gutenberg editor.
Note: Here we have not executed the npm run build command. By default the @wordpresss/block generate the /dist/ directory. If the block is not available from the Gutenberg editor then you can execute the above command.
- Create a new post from Posts > Add new
- Search from the Awesome Heading With WordPress Block block.

OR

- Click on the “Awesome Heading With WordPress Block” which add our block into the editor.

Now, Click on View Post to see the front end.

Create Gutenberg Block with wp scaffold block Create Gutenberg Block with wp scaffold block
Creating the block with wp scaffold block is two step process if we don’t have any plugin.
We are creating a new plugin and a new block wihtin it.
Let’s see how to do it.
- Create a new plugin my-gutenberg-plugin with wp scaffold plugin command.
E.g.
wp scaffold plugin my-gutenberg-plugin
After executing above command you can see something below:
? wp scaffold plugin my-gutenberg-plugin
Success: Created plugin files.
Success: Created test files.
Here, The new plugin is created into the /wp-content/plugins/ direcotry with my-gutenberg-plugin
Now, Goto our new plugin directory /wp-content/plugins/my-gutenberg-plugin/ and execute below command:
wp scaffold block my-first-block --title="My First Block" --plugin=my-gutenberg-plugin
You can see something like below:
? wp scaffold block my-first-block --title="My First Block" --plugin=my-gutenberg-plugin
Success: Created block 'My First Block'.
Here, We have created a new block My First Block.
Now, Activate the plugin and Lets see how to use it in Gutenberg Editor.
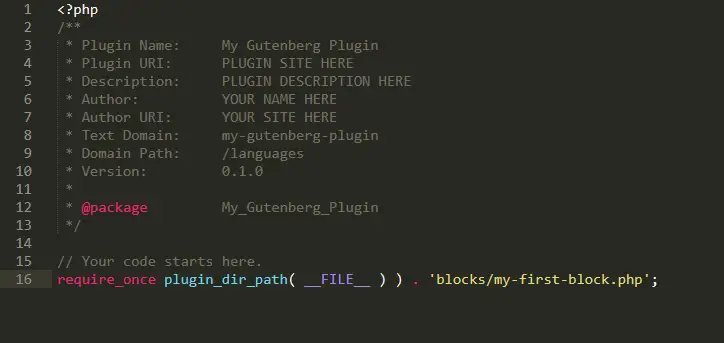
After activate you’ll not see the Gutenberg block. We need to add a single line of code which actually include the block file path.
Add below code into the My Gutenberg Plugin plugin’s my-gutenberg-plugin.php file.
// Your code starts here.
require_once plugin_dir_path( __FILE__ ) ) . 'blocks/my-first-block.php';
See below screenshot for reference:
Now, Lets create a post and add our new block My First Block.
NOTE: Here we don’t need to build the JS or CSS files because of the Gutenberg block is created with the regular javascript functions. There is NO any JSX syntax. So, We dont need to build the dist directory. We can directly use our block.
Create a new post from Posts > Add new
Search for the My First Block
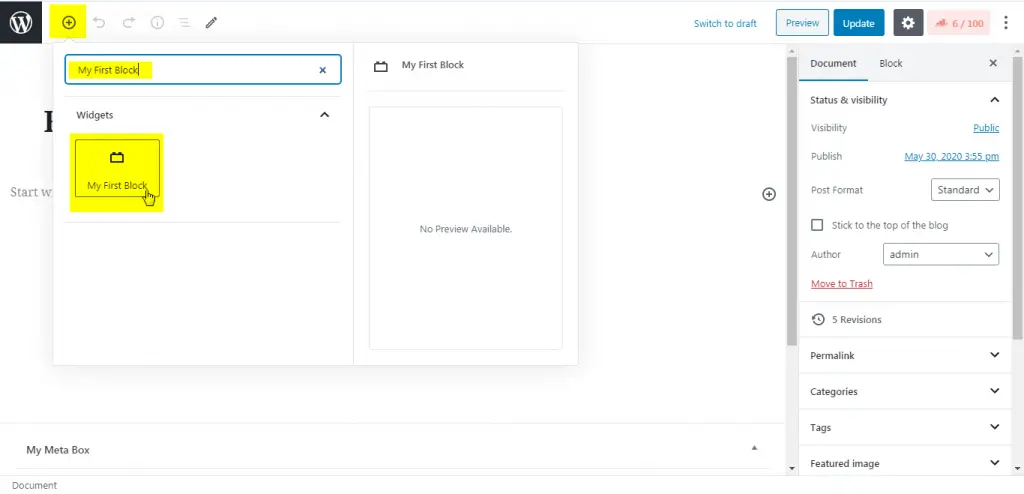
OR
You can also inline search for “My First Block” by adding `/`
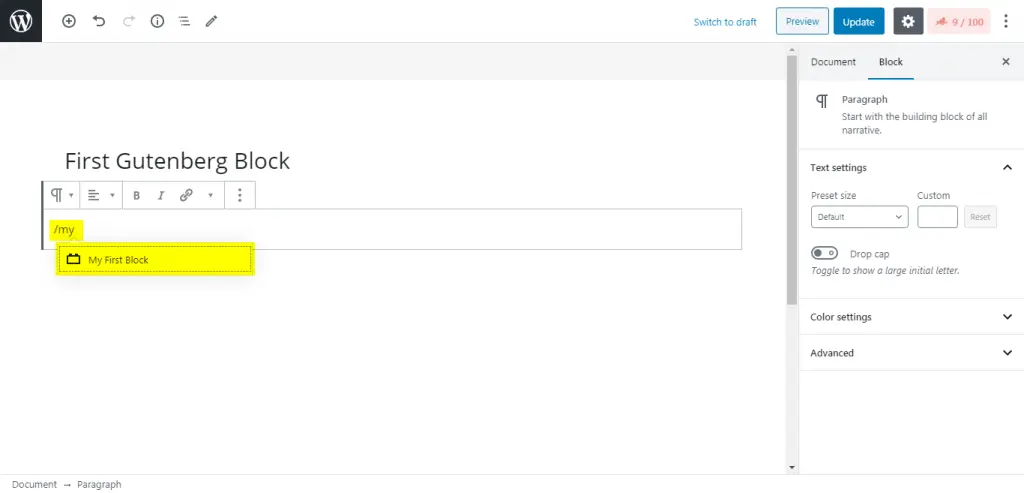
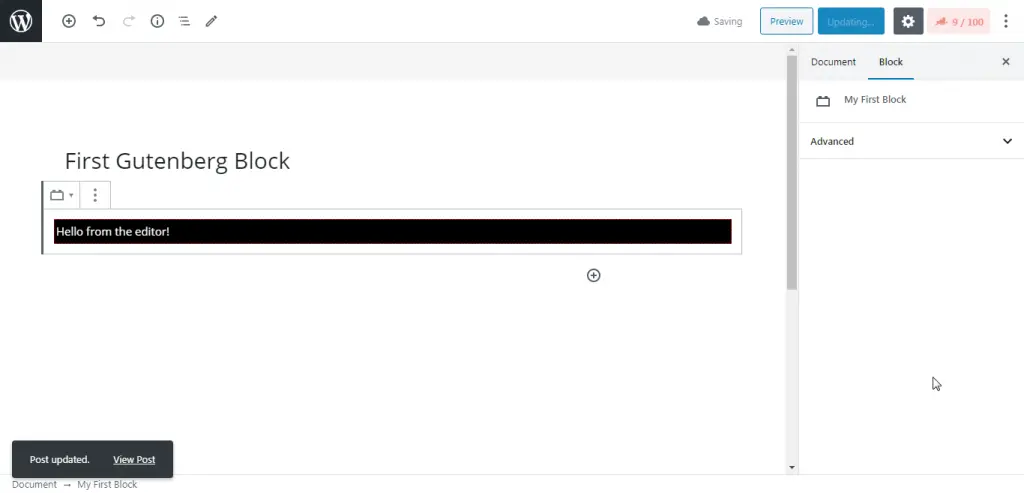
You can see the output of our block in the Guttenberg editor as below
Also, on frontend you can

REVIEW
Ultimate Blocks is a powerful Gutenberg blocks plugin specifically created for bloggers and marketers. See the Custom Gutenberg Blocks Review in a Nutshell.
Conclusion Conclusion
In this article, we learn how to create a Gutenberg block boilerplate with create-guten-block, @wordpress/block, and wp scaffold block. You can set up your custom development environment or use any of the above tools.
In the next article, you’ll see How to develop a Gutenberg block in detail?


