Setup a Blackfire profiling tool on your local machine ( I’m installing it on Windows ). Profiling help developer to analyze their coding performance. Find unwanted calls/memory issues and helps to optimize all the possible issues.
Installation Installation
Create Empty Folder
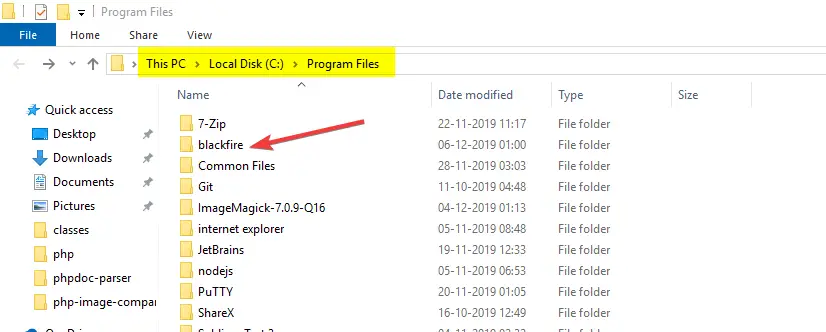
We can set up the Blackfire in any directory. I’m installing it in directory C:\Program Files\.
Create an empty folder blackfire into C:\Program Files. e.g.
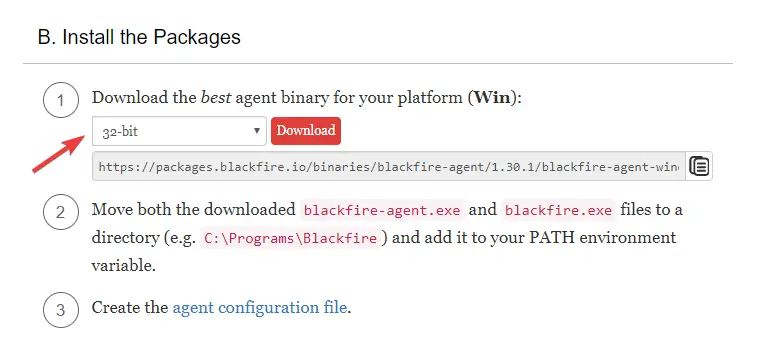
Download Blackfire 32 bit or 63 bit Zip Download Blackfire 32 bit or 63 bit Zip
Blackfire provides the zip according to our windows system configuration. We need a 32-bit or 64-bit version according to our current configuration.
To check your system configuration goto Control Panel > System and Security > System e.g.

Now, Download the zip
Note: I am installing the Blackfire version 1.30.1. You can get the latest zip from https://blackfire.io/docs/up-and-running/installation
Environment Variables Environment Variables
- Add through Command Prompt ( CMD )
- Open Command Prompt by pressing ( Windows + R ) key. Or Go to Start menu and search
command prompt. - Add command set PATH=%PATH%;C:\Program Files\Blackfire
Or
Do it with UI.

Now,
Open the command prompt and execute blackfire-agent -register command. It asks the Server ID and Server Token.
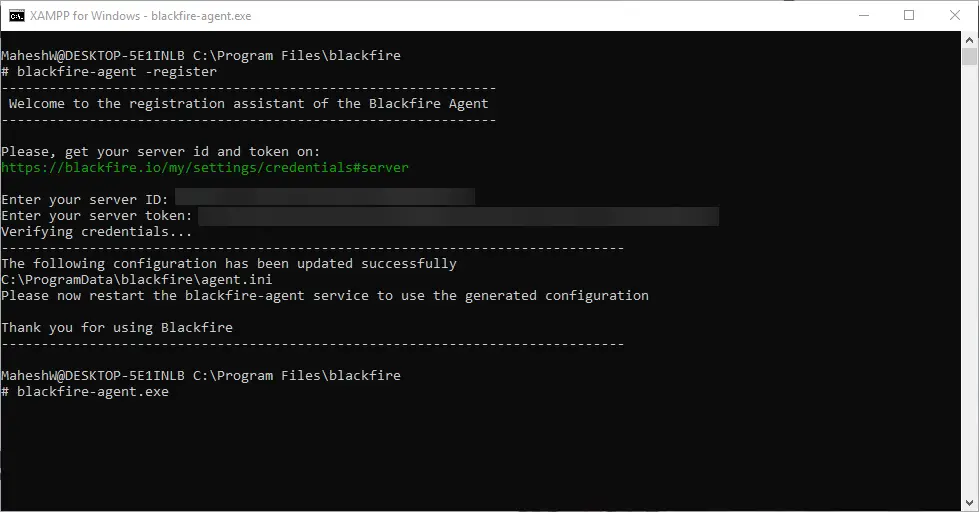
Or
Go to https://blackfire.io/docs/up-and-running/installation and execute the command e.g.

Install PHP Probe Install PHP Probe
Now, we need to install the PHP Probe depends on your current PHP version.
To check the PHP version we can use the command php -v
If you have a XAMPP then,
- Open the XAMPP Control Panel
- Click Shell
- Type command
php -v
Check the below screenshot for reference.

Here, My PHP version is 7.3.4.
So, I’m downloading the PHP Probe for with PHP version 7.3 and 32-bit system.
Or
Go to https://blackfire.io/docs/up-and-running/installation and download your preferred PHP version and system configuration.
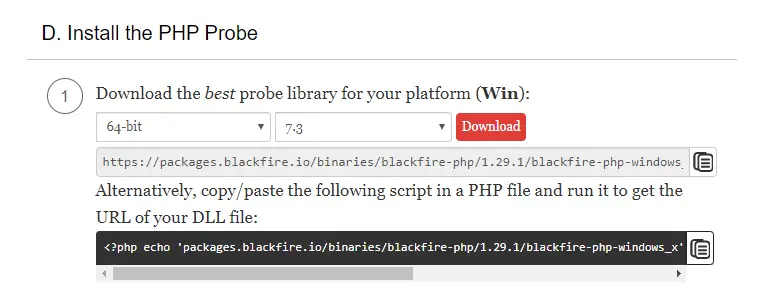
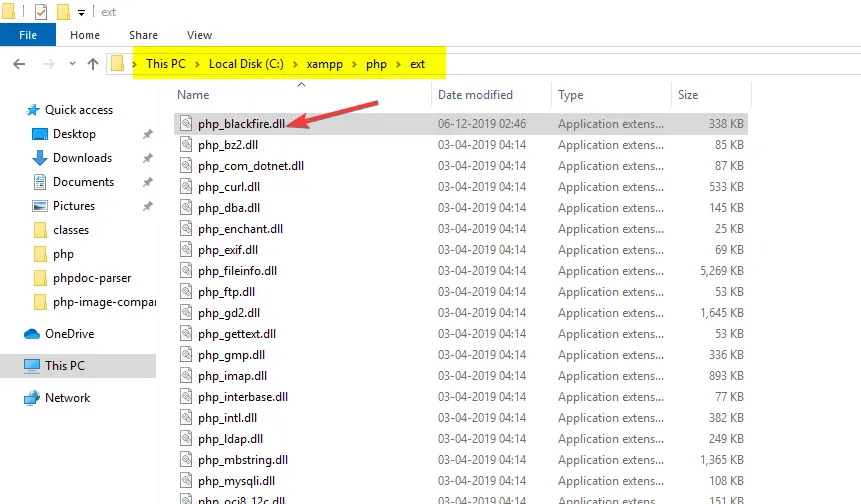
Rename the downloaded blackfire-php-windows_xx-php-xx.dll file with php_blackfire.dll E.g .
Edit php.ini file Edit php.ini file
- Open the php.ini file
- Copy and paste the below code into it.
[blackfire]
 ; extension=blackfire.so
 ; On Windows use the following configuration:
 extension=php_blackfire.dll
 ; Sets the socket where the agent is listening.
 ; Possible value can be a unix socket or a TCP address.
 ; Defaults to unix:///var/run/blackfire/agent.sock on Linux,
 ; unix:///usr/local/var/run/blackfire-agent.sock on macOS,
 ; and to tcp://127.0.0.1:8307 on Windows.
 ;blackfire.agent_socket = unix:///var/run/blackfire/agent.sock
 blackfire.agent_timeout = 0.25
 ; Log verbosity level (4: debug, 3: info, 2: warning, 1: error)
 ;blackfire.log_level = 1
 ; Log file (STDERR by default)
 ;blackfire.log_file = /tmp/blackfire.log
 ; Sets fine-grained configuration for Probe.
 ; This should be left blank in most cases. For most installs,
 ; the server credentials should only be set in the agent.
 ;blackfire.server_id =
 ; Sets fine-grained configuration for Probe.
 ; This should be left blank in most cases. For most installs,
 ; the server credentials should only be set in the agent.
 ;blackfire.server_token =
Here, I have removed ; from the extension=php_blackfire.dll line because I am using windows operating system. If you have Linux OS then you can uncomment the ; from extension=blackfire.so E.g.
 [blackfire]
 extension=blackfire.so
 ; On Windows use the following configuration:
 ; extension=php_blackfire.dll
Now, Restart the Apache and check the Blackfire PHP Probe installation with the same command php -v. E.g.
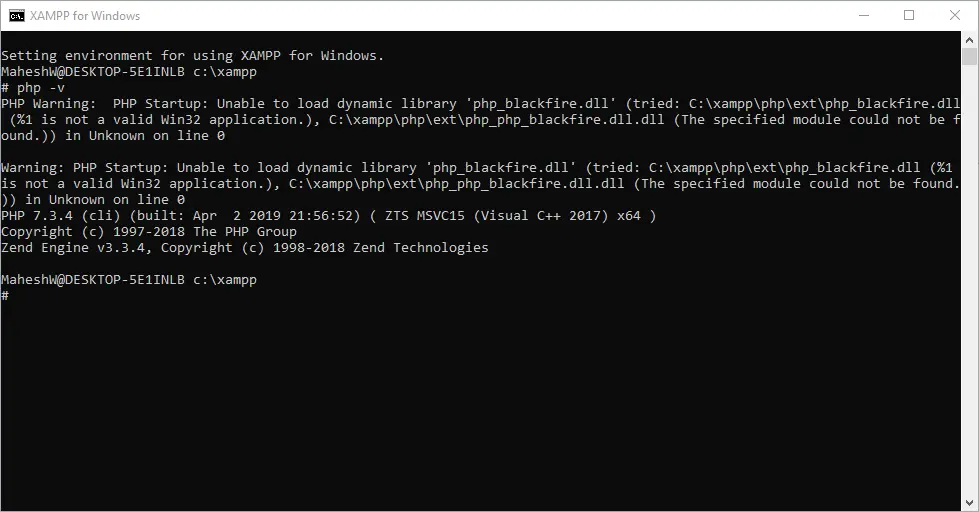
If you see a similar error then follow the below steps:
- Delete the old
C:\xampp\php\ext\php_blackfire.dll - Download the Download PHP 7.3 + 64 bit.dll
- Restart the Apache
- And then check it with
php -v
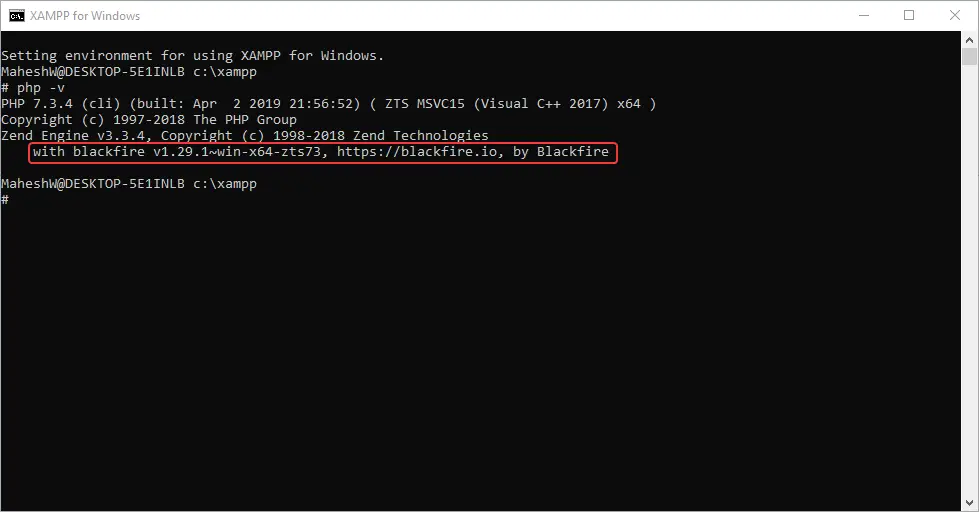
You can see the successful installation message like:
Create ‘agent.ini’ Create ‘agent.ini’
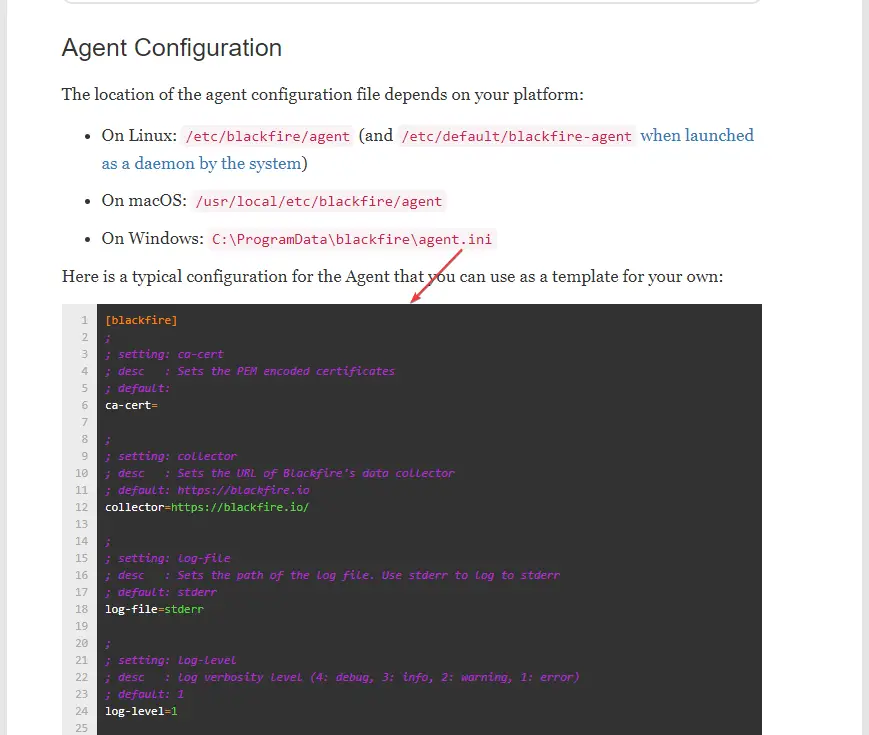
Download the ready-made agent.ini file, provided by Blackfire from https://blackfire.io/docs/reference-guide/configuration e.g.
Or
Do it manually with the below steps.
Create agent.ini file and add below code:
;
 ; setting: ca-cert
 ; desc   : Sets the PEM encoded certificates
 ; default:
 ca-cert=
 ;
 ; setting: collector
 ; desc   : Sets the URL of Blackfire's data collector
 ; default: https://blackfire.io
 collector=https://blackfire.io/
 ;
 ; setting: log-file
 ; desc   : Sets the path of the log file. Use stderr to log to stderr
 ; default: stderr
 log-file=stderr
 ;
 ; setting: log-level
 ; desc   : log verbosity level (4: debug, 3: info, 2: warning, 1: error)
 ; default: 1
 log-level=1
 ;
 ; setting: server-id
 ; desc   : Sets the server id used to authenticate with Blackfire
 ; default:
 server-id=
 ;
 ; setting: server-token
 ; desc   : Sets the server token used to authenticate with Blackfire. It is unsafe to set this from the command line
 ; default:
 server-token=
 ;
 ; setting: socket
 ; desc   : Sets the socket the agent should read traces from. Possible value can be a unix socket or a TCP address
 ; default: unix:///var/run/blackfire/agent.sock on Linux, unix:///usr/local/var/run/blackfire-agent.sock on macOS, and tcp://127.0.0.1:8307 on Windows.
 socket=unix:///var/run/blackfire/agent.sock
 ;
 ; setting: spec
 ; desc   : Sets the path to the JSON specifications file
 ; default:
 spec=
Here,
Change the server-id= with your server id like server-id=xxxxxxxxxxxxxxxxxxxxxxxxxxxxxxxxxxxxxxxxxx and Change the server-token= with your server id like server-token=xxxxxxxxxxxxxxxxxxxxxxxxxxxxxxxxxxxxxxxxxx.
Install Chrome Extension Install Chrome Extension
Open – https://chrome.google.com/webstore/detail/blackfire-profiler/miefikpgahefdbcgoiicnmpbeeomffld and install the chrome extension. e.g.

Testing Testing
Now, Let’s test the Blackfire.

Oh! We have an error.
If it happens then, Try
- Remove
blackfire-agent.exeandblackfire.exefiles fromC:\Program Files\blackfire - Download Blackfire for 64 bit.zip
- Extract the zip into
C:\Program Files\blackfire - Restart the Apache server
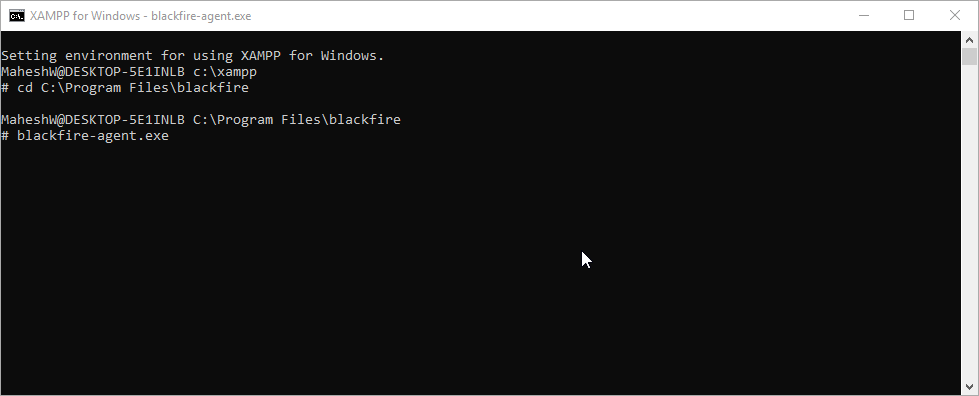
- Open Command Prompt and type below commands:
cd C:\Program Files\blackfireblackfire-agent.exe
E.g.
Now,
Refresh the browser and test the Blackfire. You can see something like below GIF.

Analyze Profiling Result Analyze Profiling Result
Goto your Blackfire dashboard and analyze your Blackfire profiling result. Click here for depth analyzing profiles
E.g.

See the profiling result


