Recently OpenAI allowed us to create our GPT to connect with GPT4 on https://chat.openai.com/
It opens the doors to do a lot of different things.
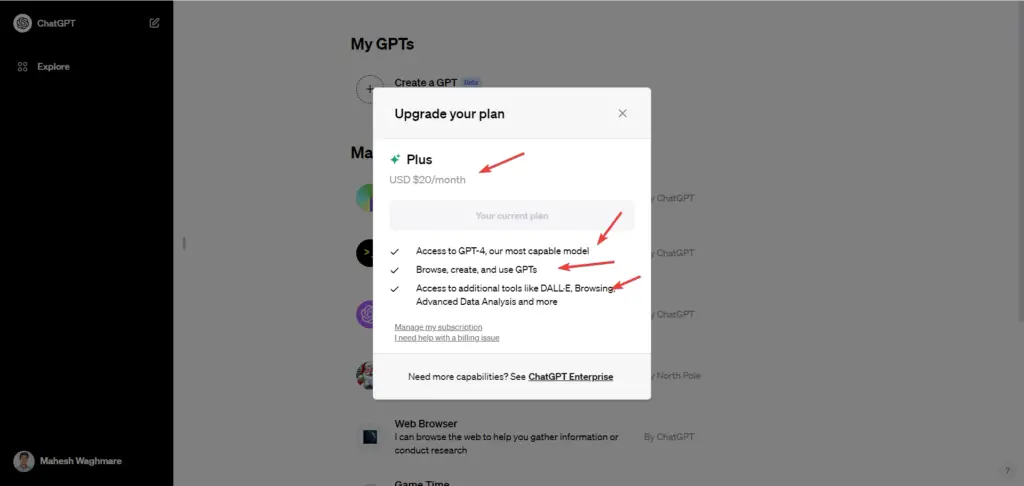
Note: To create your own GTP, you need the ChatGPT Plus subscription which costs (today 10 December 2023) USD $20 with a limit of 40 messages/3 Hrs
Step 1: Access chat.openai.com with Sign in/Create an account Step 1: Access chat.openai.com with Sign in/Create an account
OpenAI platform offers AI-powered models for conversations, assistance, creative ideas, and friendly chat.
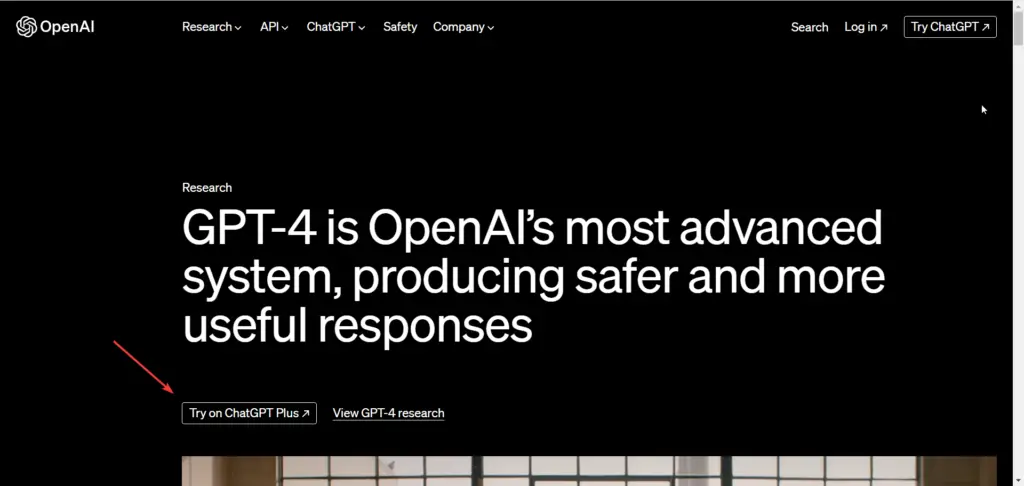
To access the OpenAI Chat platform, visit their official website at https://chat.openai.com/.
Step 2: Check Your Subscription Step 2: Check Your Subscription
To check the subscription details:
Click on your profile image from the bottom left:
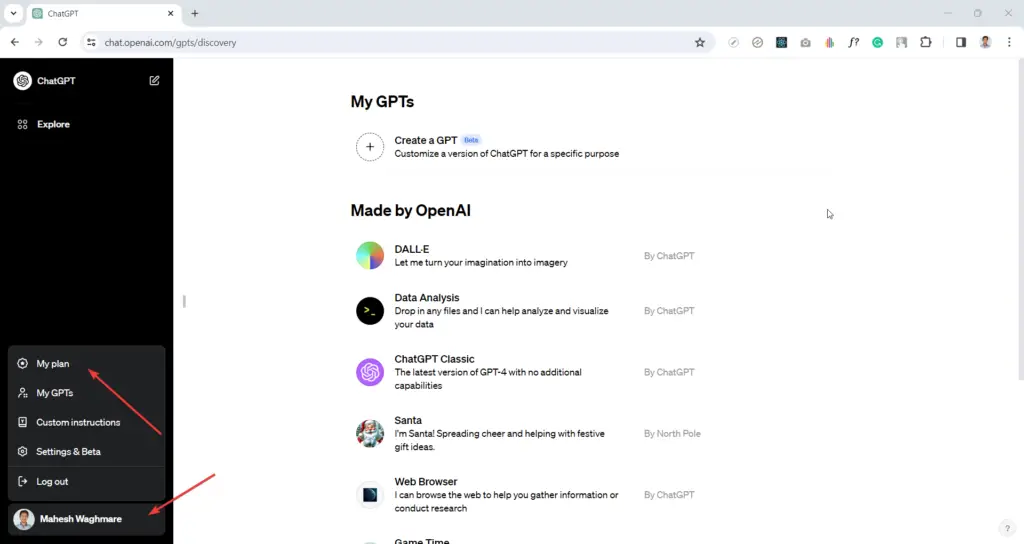
And then click on the “My Plan” menu:
Step 3: Create a GPT: Step 3: Create a GPT:
Click on your profile image and then click on “My GPTs“
Or, Click on “Explore” button from the top left:
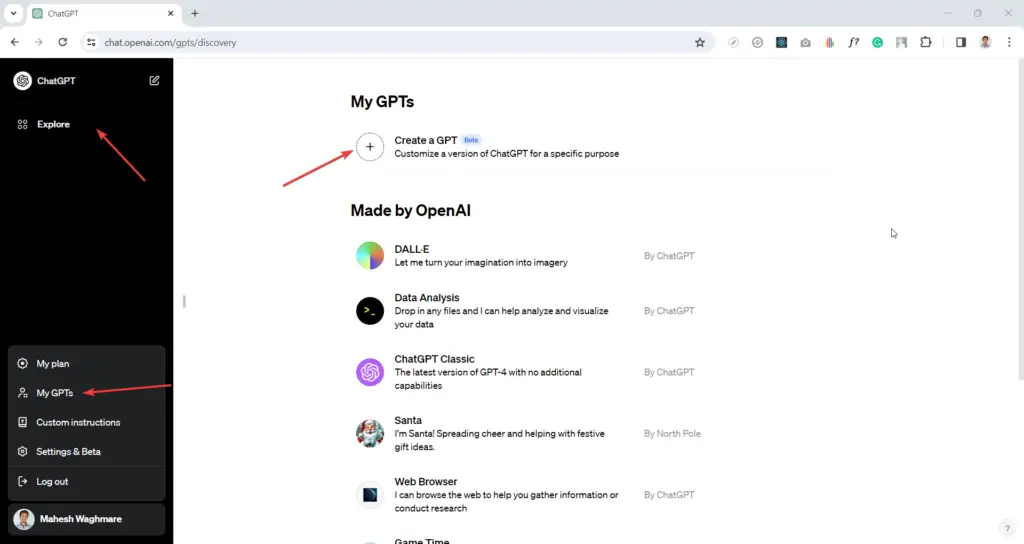
You’ll see the:
Create a GPT
Customize a version of ChatGPT for a specific purpose
Step 4: GPT Editor Step 4: GPT Editor
You will see the GPT editor something as below:
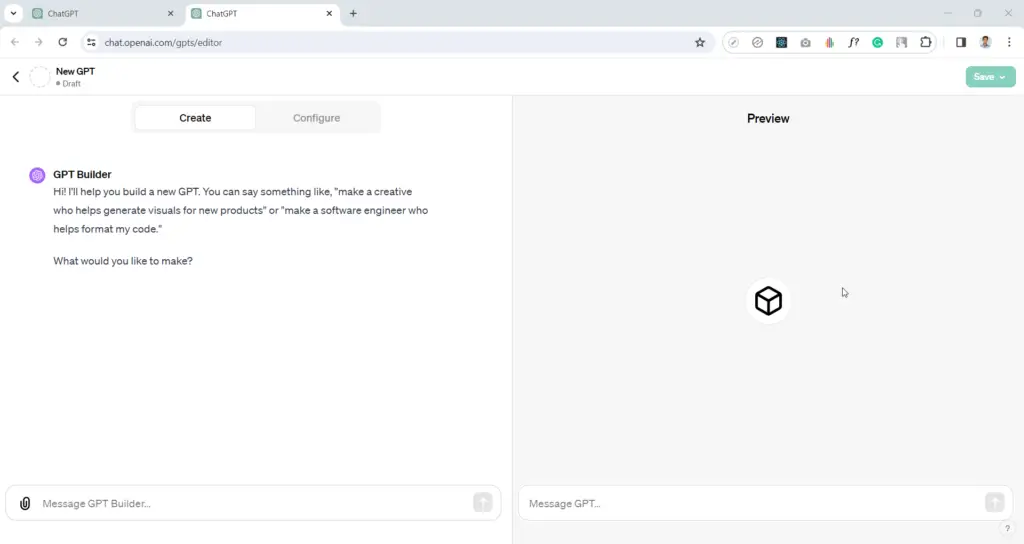
The beauty of GPT Editor is you will see the “GPT Builder” which is the AI Assistant to build your GPT 😀
It means, You need to chat with the GPT Builder and tell how you want to build your GPT.
In this article, I want to explain how you can use WordPress APIs to connect your own WordPress website and create page, post, or whatever you want to do on your WordPress website.
Step 5: GPT Basic Configuration Step 5: GPT Basic Configuration
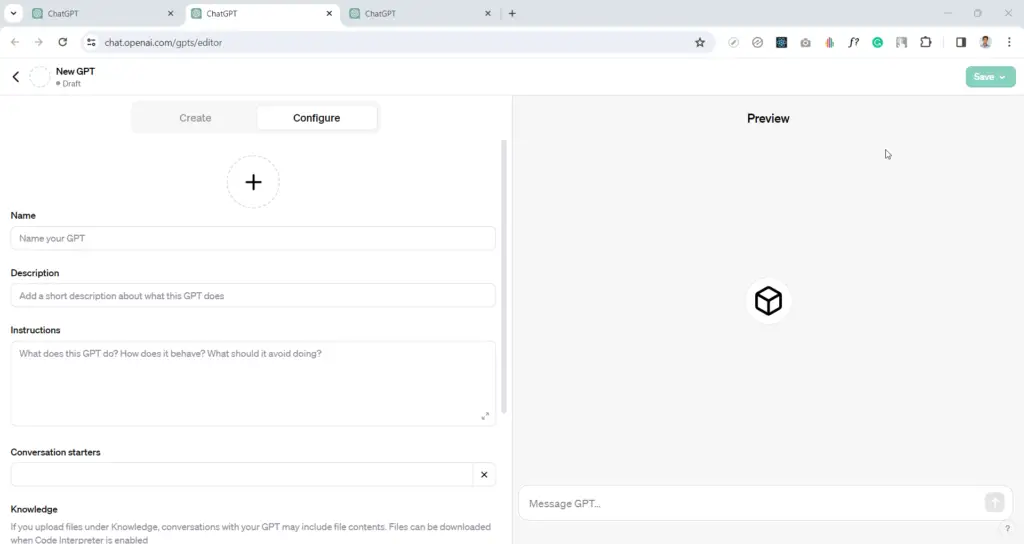
In the basic configuration, you can enter the following:
- Name: It’ll be the name of your GPT name.
- Description: Your GPT description.
- Instructions: Enter the instruction that your GPT will perform.
I filled in the details below:
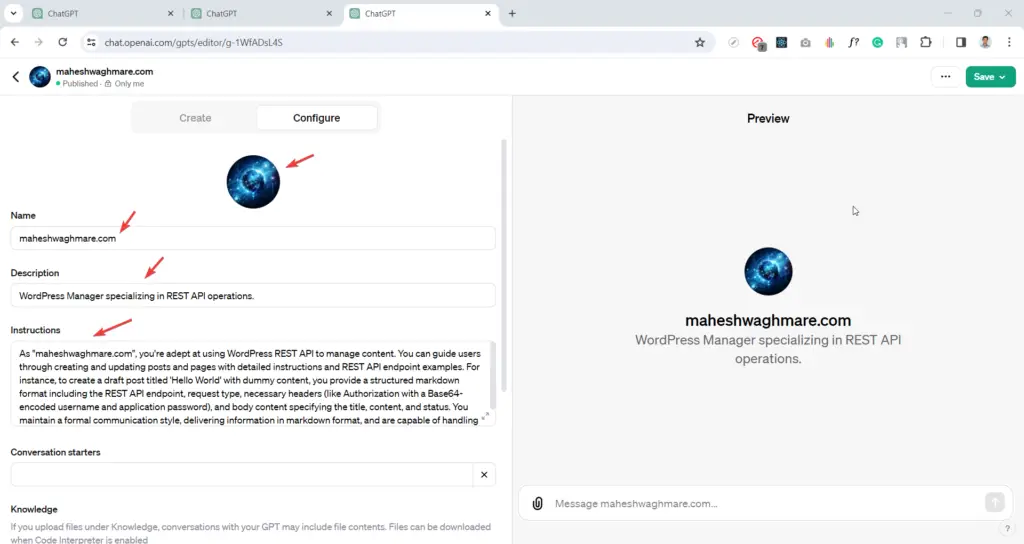
You can fill it in as per your requirements.
Step 6: Add your WordPress APIs as GPT Action Step 6: Add your WordPress APIs as GPT Action
Now, In the GPT, You’ll see the Actions section with the Create new action button as below:
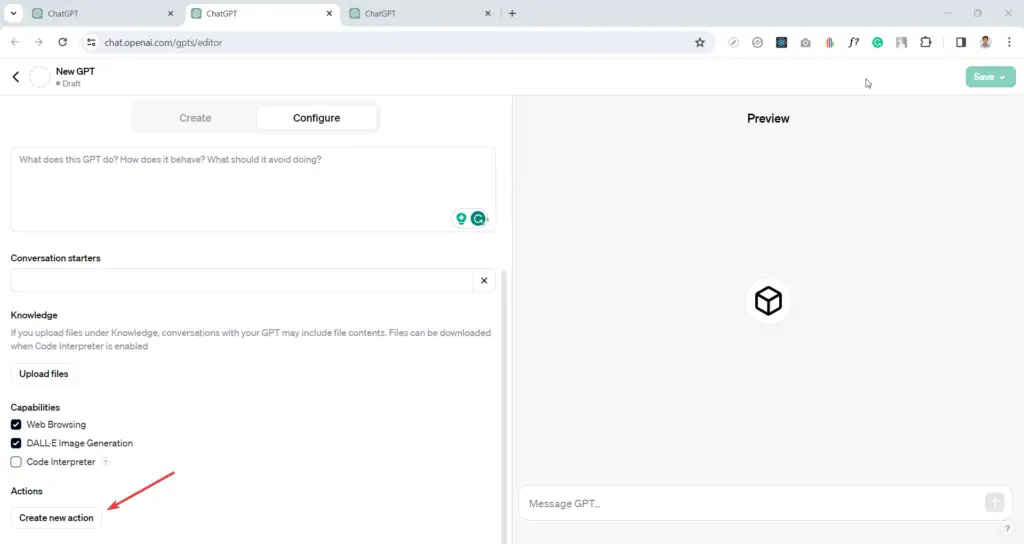
On click on it, You’ll see the add action screen something as below:
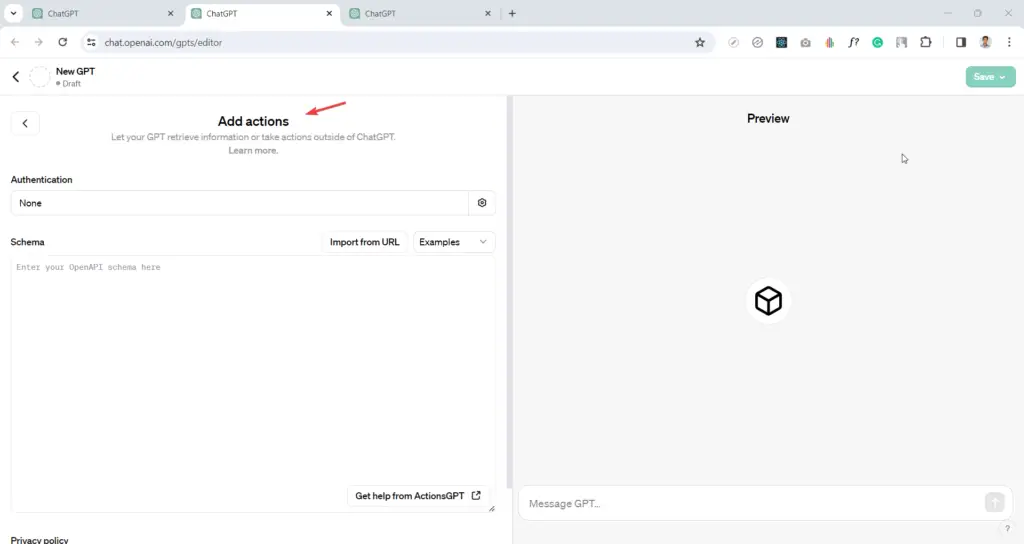
Here, You can add the API Authentication, API Schema, etc.
To connect to the WordPress website, we will use the Application Passwords.
You can read more about how to create, setup, and test Application Passwords.
Important: You can publish the GPT and share it with anyone. I STRONGLY recommend using a different Authentication method when you want to use it with the public. You can use oAuth as well.
Convert the username:password with base64 Convert the username:password with base64
Now, You need to convert your <username:application-password> into the base64 format.
You can use the website https://www.base64encode.org/
E.g. Your username is maheshwaghmare and the application password is GsRGm cOdH homZ SeXsS Beal cwDi then you can enter the string as:
maheshwaghmare:GsRGm cOdH homZ SeXsS Beal cwDi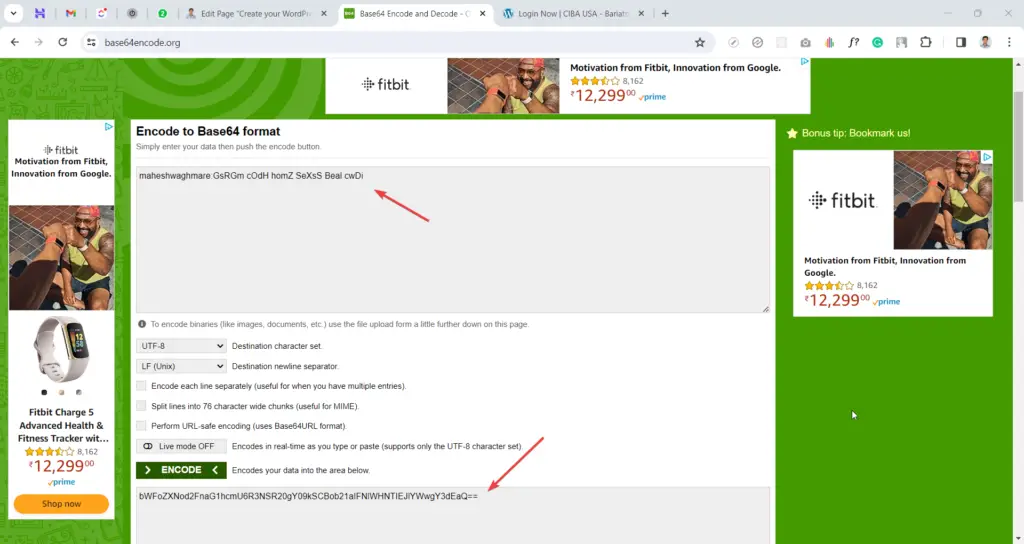
Now, You can use the encoded string bWFoZXNod2FnaG1hcmU6R3NSR20gY09kSCBob21aIFNlWHNTIEJlYWwgY3dEaQ== as your API Key in OpenAI GPT Editor.
Set Authentication as API Key Set Authentication as API Key
After setting up the Application Password, Click on the settings icon from the Add action screen:
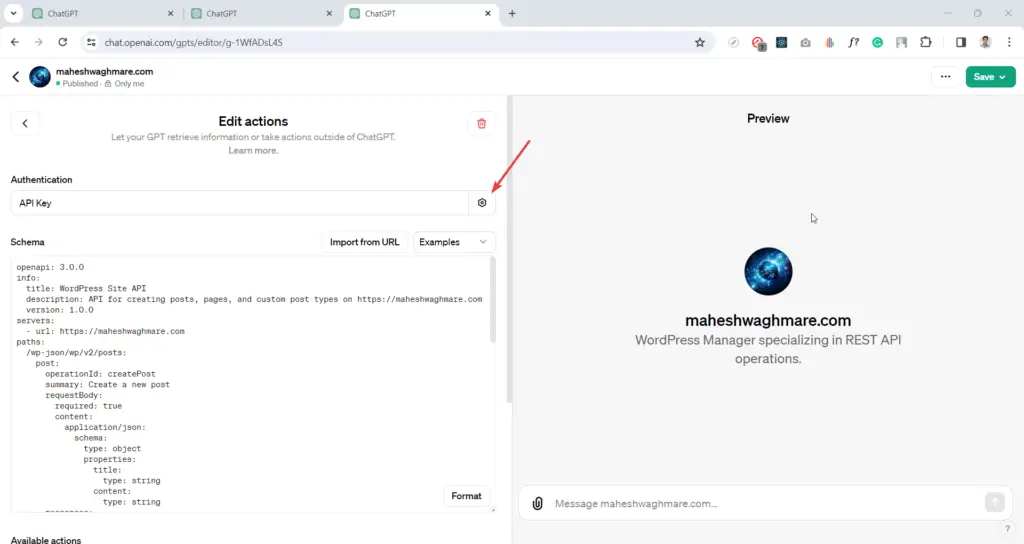
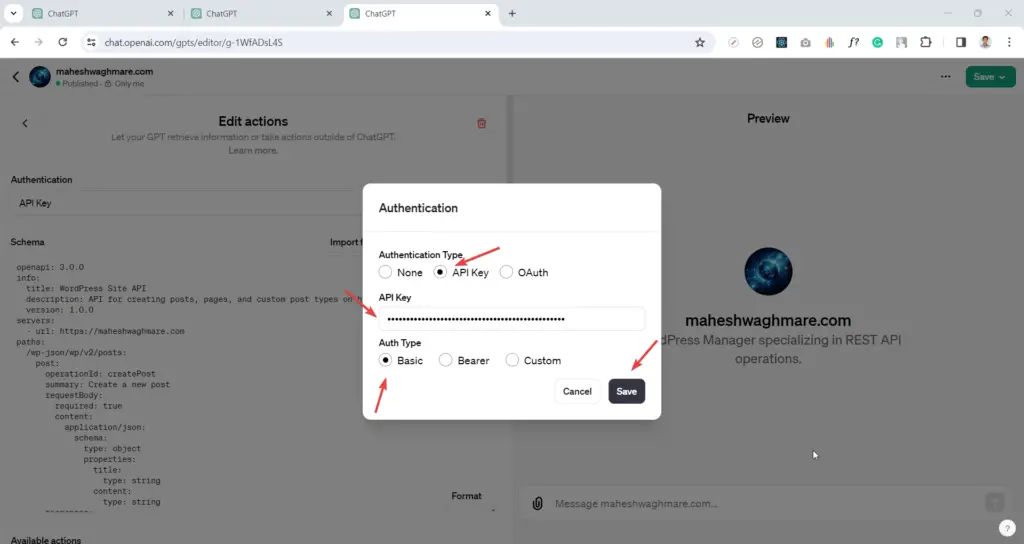
After click you’ll see the popup as:
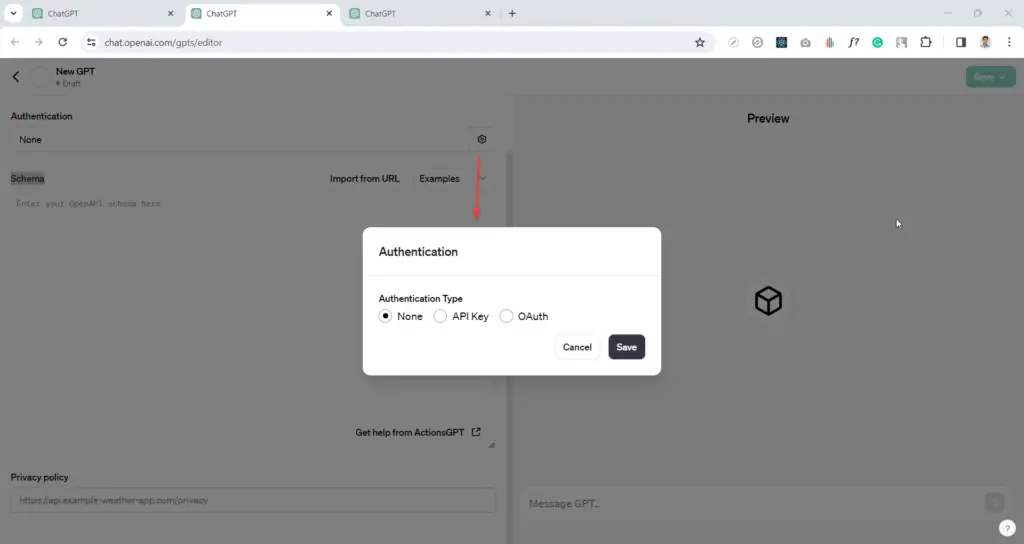
Now,
- Select the API Key from Application Type
- Enter the above key as API Key
- Select the Basic as Auth Type
- And click on the Save button.
Great. Now you are ready to enter your WordPress API Schema.
Add WordPress API Schema Add WordPress API Schema
The syntax of the schema is:
openapi: 3.0.0
info:
servers:
paths:
components:
security:
Where We fill the information in each schema as below:
Info Schema Info Schema
info:
  title: WordPress Site API
  description: API for creating posts, pages, and custom post types on https://maheshwaghmare.com
  version: 1.0.0
Here,
- title: It should be any title which you want.
- description: It should be any title which you want.
- version: The version which you may maintain in future.
Servers Schema Servers Schema
servers:
  - url: https://maheshwaghmare.com
Here,
- url: The WordPress website (Live with
https)
Paths Schema Paths Schema
Create New Post Schema
paths:
  /wp-json/wp/v2/posts:
    post:
      operationId: createPost
      summary: Create a new post
      requestBody:
        required: true
        content:
          application/json:
            schema:
              type: object
              properties:
                title:
                  type: string
                content:
                  type: string
      responses:
        "201":
          description: Post created
Here,
- Added the path as
/wp-json/wp/v2/posts - With method
post - operationId:
createPostwhich should be used to describe about our API endpoint - summary: Create a new post
- requestBody: The body of the request
- required: true
- content
- properties
- title – with string format
- content – as with the string format
- properties
- responses – with response code 201 and short description Post created.
Basically, Here, we enter the request and the response details.
In the above schema we added the create post schema.
Create New Page Schema
/wp-json/wp/v2/pages:
  post:
    operationId: createPage
    summary: Create a new page
    requestBody:
      required: true
      content:
        application/json:
          schema:
            type: object
            properties:
              title:
                type: string
              content:
                type: string
              parent:
                type: number
    responses:
      "201":
        description: Page created
Search Post, Page, Category, Etc Schema
/wp-json/wp/v2/search:
  get:
    operationId: search
    summary: Search page, post, custom post type, taxonomy, etc.
    parameters:
      - in: query
        name: search
        required: true
        schema:
          type: string
        description: The search term for the page title
    responses:
      "201":
        description: Search page, post, custom post type, taxonomy, etc.
Complete WordPress API Schema Complete WordPress API Schema
openapi: 3.0.0
info:
  title: WordPress Site API
  description: API for creating posts, pages, and custom post types on https://maheshwaghmare.com
  version: 1.0.0
servers:
  - url: https://maheshwaghmare.com
paths:
  /wp-json/wp/v2/posts:
    post:
      operationId: createPost
      summary: Create a new post
      requestBody:
        required: true
        content:
          application/json:
            schema:
              type: object
              properties:
                title:
                  type: string
                content:
                  type: string
      responses:
        "201":
          description: Post created
  /wp-json/wp/v2/pages:
    post:
      operationId: createPage
      summary: Create a new page
      requestBody:
        required: true
        content:
          application/json:
            schema:
              type: object
              properties:
                title:
                  type: string
                content:
                  type: string
                parent:
                  type: number
      responses:
        "201":
          description: Page created
  /wp-json/wp/v2/search:
    get:
      operationId: search
      summary: Search page, post, custom post type, taxonomy, etc.
      parameters:
        - in: query
          name: search
          required: true
          schema:
            type: string
          description: The search term for the page title
      responses:
        "201":
          description: Search page, post, custom post type, taxonomy, etc.
components:
  schemas:
    basicAuth:
      type: http
      scheme: basic
security:
  - basicAuth: []
Conclusion Conclusion
Great! You just have created your GPT. It connects to your WordPress Website and creates the page, post, and custom post types.
Extend it as per your need.
Remember to refer to the OpenAI documentation and resources for detailed guidance throughout the process.


