In this article we are going to see how to perform basic authentication requests with plugin JSON Basic Authentication.
Table of Content
Overview Overview
We can perform below operation though Rest API:
- Retrieve
- Create
- Update
- Delete
For Create, Update or Delete Rest API request we need to authenticate the request.
Quick Note: WordPress provides a Rest API support for post, pages, and custom post types. If your custom post type or taxonomy is not available in Rest API endpoint then see the show_in_rest parameter is set as true while registering the post type. This is applicable same for the custom taxonomies too.
There are multiple ways to authenticate the user to perform these requests.
In this article we are going to perform Basic Authentication request with JSON Basic Authentication.
Note: In WordPress beta plugins list we have plugin Application Passwords. We can use perform the Basic Authentication request without using users’ actual passwords.
Instead of user password Application Passwords provide a way to create multiple applications for each user for a specific purpose.
We can use any application password to perform basic authentication request. You can see all about application passwords.
NOTE: JSON Basic Authentication and Application Passwords are NOT useful production environment. You can use oAuth or oAuth 2 authentication. So, I recommend avoiding using it on production sites.
How to install? How to install?
Follow below steps to install the Basic Authentication.
- Download Plugin zip from – https://github.com/WP-API/Basic-Auth

- Go to Plugins > Add new
- Click on Upload Plugin
- Click on Choose File and select downloaded plugin zip.
- And Click on Install Now
See below screenshot for reference:

- and finally, click on the Activate button
You can see the plugin after install & activate in pluign list page like:

Examples of Basic Authentications Examples of Basic Authentications
Lets see how to use the Basic Authentication request with practical examples.
Here, I’m using Postman, CURL & wp_remote_post to demonstrate how we can create a new post with Rest API request.
Create a post with Postman Create a post with Postman
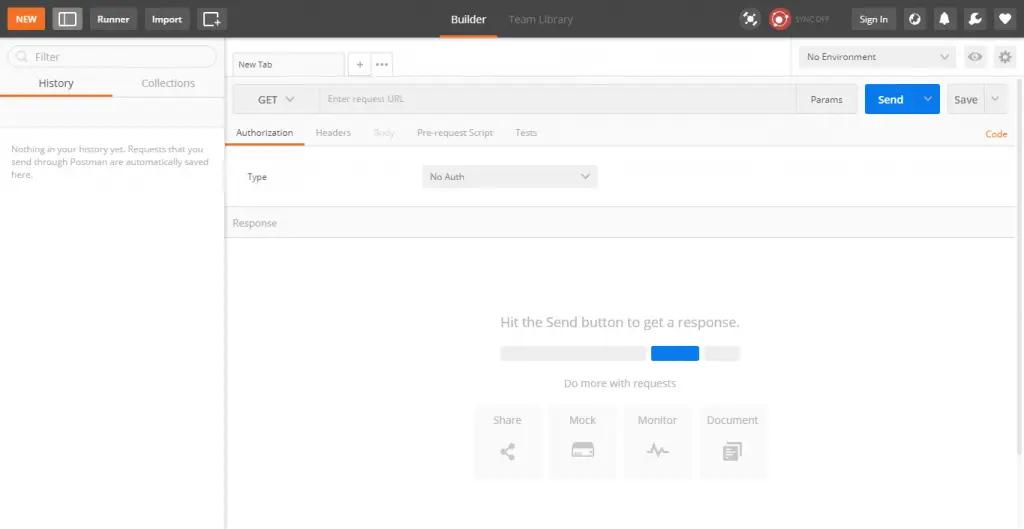
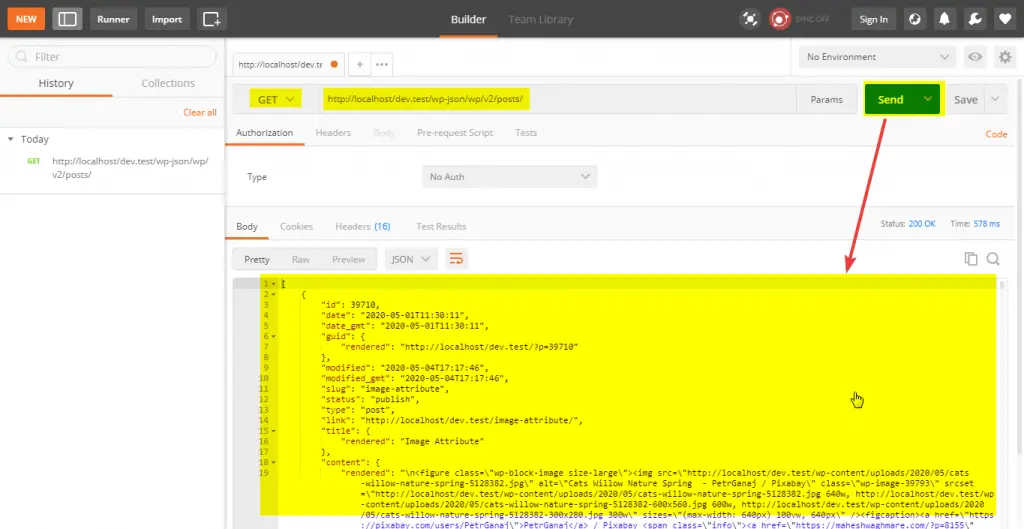
- Open Postman

- Select GET method
- Use your website URL http://example.com/wp-json/wp/v2/posts/
- Click on Send
You will see something like:

Here, We have not used Basic Authentication request anywhere. We have just get the list of all posts to check the Rest API is enabled or not on our website.
Most of the times Rest API is disabled by security plugins and other plugins like https://wordpress.org/plugins/disable-json-api/
Okay. Now We are able to perform basic authentication request.
In this example we are going to create a new post with Basic authentication.
To create the post we can need to use endpoint http://example.com/wp-json/wp/v2/posts/.
In this example I’m just using only the title field to create a new post title.
You can see all available fields at – https://developer.wordpress.org/rest-api/reference/posts/#create-a-post
Lets follow below steps to create a new post:
- Set the POST method
- Add endpoint with title parameter and add post title like –
/wp-json/wp/v2/posts/?title=Basic Auth Post 1 - Select Authentication type Basic auth
- Add your username
- Add your password
Note: Here the username and password which we use to login to the website.
- Click on Send button.
See below screenshot for reference:

Here, We have created a new post with name Basic Auth Post 1.
Our post list listed in draft as below:

Note: If you notice that In first screenshot I have use the URL: http://localhost/dev.test/wp-json/wp/v2/posts/ and while creating post I have used http://localhost/maheshwaghmare.com/wp-json/wp/v2/posts/?title=Basic Auth Post 1 because I have installed pluign on my site http://localhost/maheshwaghmare.com/.
Update Site Title with Postman Update Site Title with Postman
I’m using another example in which we are going to update the site title. Basically we update the site title from the Settings > General.
In WordPress we have Rest API endpoint /wp-json/wp/v2/settings/ which allow us to get or update the settings.
Lets update the site title with the help of /wp-json/wp/v2/settings/?title=Hello World Basic Authentication request.
Here I’m just using the title for demonstration. But, You can use other parameters too. See all available parameters list at https://developer.wordpress.org/rest-api/reference/settings/#update-a-site-setting
Below is the screenshot which is taken BEFORE performing Rest API request.

Now, We are sending the POST request to the /wp-json/wp/v2/settings/ endpoint and pass the title as Hello World.

In below screenshot we can see our site title is change from Mahesh Waghmare with Hello World.

Create a post with CURL Create a post with CURL
Syntax
curl --user "username:password" -X POST -d "title={Post Title}" http://example.com/wp-json/wp/v2/posts/
Example
Output:
{"id":19033,"date":"2020-05-12T14:20:31","date_gmt":"2020-05-12T14:20:31","guid":{"rendered":"http:\/\/localhost\/maheshwaghmare.com\/?p=19033","raw":"http:\/\/localhost\/maheshwaghmare.com\/?p=19033"},"modified":"2020-05-12T14:20:31","modified_gmt":"2020-05-12T14:20:31","password":"","slug":"","status":"draft","type":"post","link":"http:\/\/localhost\/maheshwaghmare.com\/?p=19033","title":{"raw":"Basic Auth Post 2","rendered":"Basic Auth Post 2"},"content":{"raw":"","rendered":"","protected":false,"block_version":0},"excerpt":{"raw":"","rendered":"","protected":false},"author":1,"featured_media":0,"comment_status":"open","ping_status":"open","sticky":false,"template":"","format":"standard","meta":[],"categories":[1],"tags":[],"permalink_template":"http:\/\/localhost\/maheshwaghmare.com\/%postname%\/","generated_slug":"basic-auth-post-2","_links":{"self":[{"href":"http:\/\/localhost\/maheshwaghmare.com\/wp-json\/wp\/v2\/posts\/19033"}],"collection":[{"href":"http:\/\/localhost\/maheshwaghmare.com\/wp-json\/wp\/v2\/posts"}],"about":[{"href":"http:\/\/localhost\/maheshwaghmare.com\/wp-json\/wp\/v2\/types\/post"}],"author":[{"embeddable":true,"href":"http:\/\/localhost\/maheshwaghmare.com\/wp-json\/wp\/v2\/users\/1"}],"replies":[{"embeddable":true,"href":"http:\/\/localhost\/maheshwaghmare.com\/wp-json\/wp\/v2\/comments?post=19033"}],"version-history":[{"count":0,"href":"http:\/\/localhost\/maheshwaghmare.com\/wp-json\/wp\/v2\/posts\/19033\/revisions"}],"wp:attachment":[{"href":"http:\/\/localhost\/maheshwaghmare.com\/wp-json\/wp\/v2\/media?parent=19033"}],"wp:term":[{"taxonomy":"category","embeddable":true,"href":"http:\/\/localhost\/maheshwaghmare.com\/wp-json\/wp\/v2\/categories?post=19033"},{"taxonomy":"post_tag","embeddable":true,"href":"http:\/\/localhost\/maheshwaghmare.com\/wp-json\/wp\/v2\/tags?post=19033"}],"wp:action-publish":[{"href":"http:\/\/localhost\/maheshwaghmare.com\/wp-json\/wp\/v2\/posts\/19033"}],"wp:action-unfiltered-html":[{"href":"http:\/\/localhost\/maheshwaghmare.com\/wp-json\/wp\/v2\/posts\/19033"}],"wp:action-sticky":[{"href":"http:\/\/localhost\/maheshwaghmare.com\/wp-json\/wp\/v2\/posts\/19033"}],"wp:action-assign-author":[{"href":"http:\/\/localhost\/maheshwaghmare.com\/wp-json\/wp\/v2\/posts\/19033"}],"wp:action-create-categories":[{"href":"http:\/\/localhost\/maheshwaghmare.com\/wp-json\/wp\/v2\/posts\/19033"}],"wp:action-assign-categories":[{"href":"http:\/\/localhost\/maheshwaghmare.com\/wp-json\/wp\/v2\/posts\/19033"}],"wp:action-create-tags":[{"href":"http:\/\/localhost\/maheshwaghmare.com\/wp-json\/wp\/v2\/posts\/19033"}],"wp:action-assign-tags":[{"href":"http:\/\/localhost\/maheshwaghmare.com\/wp-json\/wp\/v2\/posts\/19033"}],"curies":[{"name":"wp","href":"https:\/\/api.w.org\/{rel}","templated":true}]}}
E.g.

Output

Create a post with wp_remote_post Create a post with wp_remote_post
Try below code:
Output –

Performing Basic Authentication Rest API requests in WordPress with JSON Basic Authentication.
Tweet


