Are you working on the staging website?
And want to check how it is visually different than the live site?
While checking it page by page mostly we don’t notice the pixels.
There should be some small minor spacing differences between the live vs staging website.
E.g.

Then this article is for you.
In this article we are going to see:
Pre Requirements Pre Requirements
Before going further we need two tools:
- capture-website-cli
- ImageMagick
Both tools are FREE to use.
We’ll install them and use them to see the visual changes of staging vs the live website.
The capture-website-cli package The capture-website-cli package
The capture-website-cli is an NPM package.
It allows us to generate the website screenshot with the CLI command.
It also gives various options to manipulate, generate the screenshot with website viewport size, add scripts, etc.
You can check all the available customization options of capture-website-cli package.
There are different tools available to generate the screenshots:
But, After trying all, The capture-website-cli fits my requirement.
Install the capture-website-cli Install the capture-website-cli
Use the below command to install the package
npm install --global capture-website-cli
Syntax of capture-website-cli Syntax of capture-website-cli
Below is the syntax for using the package:
capture-website {Website} {Image}
Example of capture-website-cli Example of capture-website-cli
Below is an example of using it.
capture-website https://maheshwaghmare.com/ --output=home.png
See the complete article on installing and using the capture-website-cli with different options.
The ImageMagick Tool The ImageMagick Tool
ImageMagick is a free and open-source software suite for displaying, converting, and editing raster image and vector image files.
We are going to use the compare CLI command which is provided by ImageMagick.
You can:
- Install ImageMatick on Linux
- Install ImageMatick on Mac OS X
- Install ImageMagick on iOS
- Install ImageMatick on Windows
How to generate a website screenshot How to generate a website screenshot
In this example, I’m using my website https://maheshwaghmare.com/
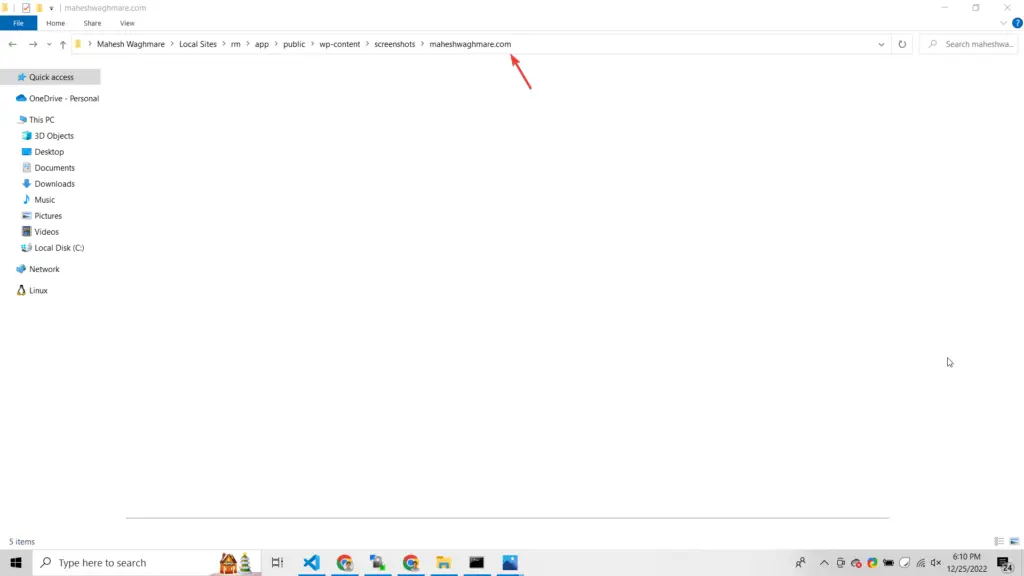
I’m generating images so created a folder to store images as:

Note: It’s not required to create a directory. You can generate images anywhere you want.
Generate a screenshot of the live website Generate a screenshot of the live website
Follow the below steps to generate the screenshot of https://maheshwaghmare.com/
Step 1: Open the terminal or command prompt (CMD)
Step 2: Execute the command:
capture-website https://maheshwaghmare.com/ --output=home.png --scale-factor=1 --full-page
Here, I have used parameters such as:
- –scale-factor=1 – To generate the normal scale screenshot.
- –full-page – Generate the full-page screenshot
Read about all capture-website-cli additional parameters
E.g.

I have used the --style="style.css" just for the demo purpose. You can avoid it.
You’ll see the home.png image is generated into your fold something as:

By default, the image is generated with a 1024px website width.
We can change the default page width with the –width parameter.
We’ll check about the –width parameter in the below section where we generate the screenshot of the home page for the mobile screen.
Generate the screenshot of the staging website Generate the screenshot of the staging website
I don’t have the staging site so the above image generated doing changes on https://maheshwaghmare.com/
So, I’m using the same website to generate the images after making some changes.
NOTE: For demo purposes, I have just changed a few texts.
Execute the command:
capture-website https://maheshwaghmare.com/ --output=home-new.png --scale-factor=1 --full-page
Note: Here I just have to change the file name as home-new.png

We’ll see the 2nd image as:

Compare the staging vs live screenshot Compare the staging vs live screenshot
Now we have two images:
home.png– Generated before making changeshome-new.png– Generated after making small changes
We are going to use the ImageMagick compare command.
To compare the images:
Step 1: Open terminal/command prompt (CMD)
Step 2: Execute compare command as:
magick compare -verbose -metric mae home.png home-new.png home-diff.png
Here, we have added:
- home.png – The old image
- home-new.png – The new image
- home-diff.png – The difference between two images
E.g.

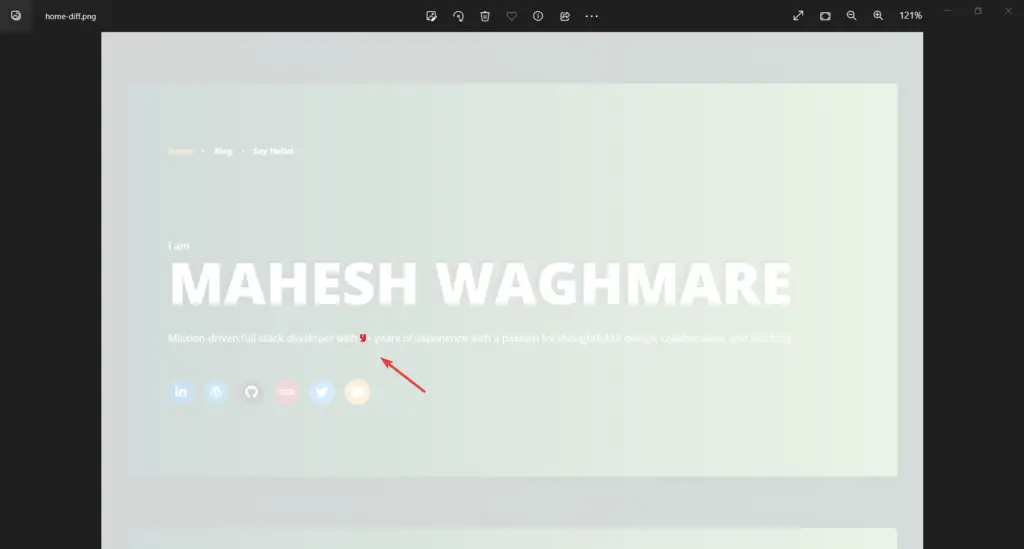
You’ll see the home-diff.png image as:

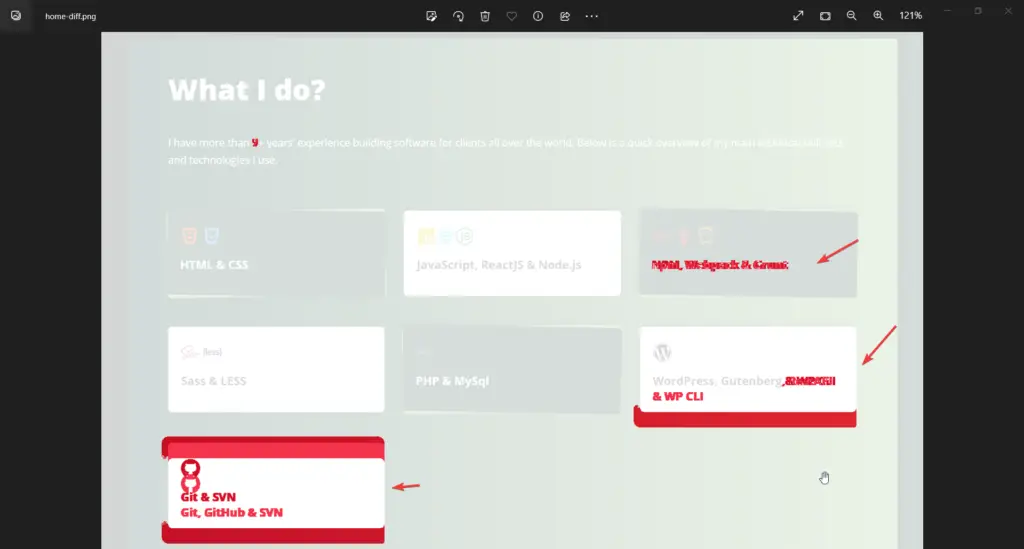
See the differences between the two images See the differences between the two images
Changes from the first section:

Changes from 2nd section:

Below are all those generated images:


Compare the mobile screen changes Compare the mobile screen changes
Below are the commands we execute to generate the screenshot of the website for the mobile viewport:
capture-website https://maheshwaghmare.com/ --output=home-mobile.png --scale-factor=1 --full-page --width=360
Here, We have:
--width– Added parameter with 360 widths to generate the image for the mobile screen.home-mobile.png– Change the image name for the mobile screenshot
Now, We’ll generate the other screenshot and compare them with the same as above:
capture-website https://maheshwaghmare.com/ --output=home-mobile.png --scale-factor=1 --full-page --width=360
capture-website https://maheshwaghmare.com/ --output=home-mobile-new.png --scale-factor=1 --full-page --width=360
magick compare -verbose -metric mae home-mobile.png home-mobile-new.png home-mobile-diff.png
Limitations Limitations
Manually and Time-consuming Manually and Time-consuming
Not exactly, but we’ll need to generate the screenshots manually for all the pages and for all the screens.
E.g.
Generate home page + desktop versions as:
capture-website https://staging.com/ --output=home.png --scale-factor=1 --full-page
capture-website https://live.com/ --output=home-new.png --scale-factor=1 --full-page
magick compare -verbose -metric mae home.png home-new.png home-diff.png
Generate home page + mobile versions as:
capture-website https://staging.com/about/ --output=about.png --scale-factor=1 --full-page
capture-website https://live.com/about/ --output=about-new.png --scale-factor=1 --full-page
magick compare -verbose -metric mae about.png about-new.png about-diff.png
Generate about page + desktop versions as:
capture-website https://staging.com/ --output=home-mobile.png --scale-factor=1 --full-page --width=360
capture-website https://live.com/ --output=home-mobile-new.png --scale-factor=1 --full-page --width=360
magick compare -verbose -metric mae home-mobile.png home-mobile-new.png home-mobile-diff.png
Generate about page + mobile versions as:
capture-website https://staging.com/about/ --output=about-mobile.png --scale-factor=1 --full-page --width=360
capture-website https://live.com/about/ --output=about-mobile-new.png --scale-factor=1 --full-page --width=360
magick compare -verbose -metric mae about-mobile.png about-mobile-new.png about-mobile-diff.png
Here, we have generated 2 desktop and 2 mobile screenshots of home and about.
Which is a bit time-consuming but worth it for a quick check of the difference with pixel perfect.
Top changes affect bottom sections Top changes affect bottom sections
If we have a lot of spacing changes on the top then we’ll see all those changes for the bottom section in the difference.
We can avoid this by taking a screenshot of sections or specific elements from the webpage.
How to capture the screenshot of one of the sections from the website? How to capture the screenshot of one of the sections from the website?
I have generated the screenshot of the first section of my home page as:
capture-website https://maheshwaghmare.com/ --output=home-section-intro.png --scale-factor=1 --element=".section-intro"
Here,
--output=home-section-intro.png– Set the image name as home-section-intro.png--element=".section-intro"– Set the target element to capture screenshots for. I have the CSS class .section-intro to the first section.
E.g.

You’ll see the new image as:

Webpage Timeout Webpage Timeout
Sometimes if webpage loss takes some time then the image may not generate as expected.
To generate the exact image you can use the --timeout parameter.
E.g.
capture-website https://maheshwaghmare.com/ --output=home-section-intro.png --scale-factor=1 --element=".section-intro" --timeout=300
Here, I have added the 300 seconds to the timeout. If 300 seconds exceed only then our screenshot does not generate.
If you want to check the visual changes of live vs staging website then this article is for you.
If you want to monitor the visual changes of your website then you may check the website:


